►Statistics
Rating:
Stats:
Attribute base 20* 40* 50* 60* 70* 80* 90 MAX HP 1005 3468 5801 7491 8985 10487 12000 12907 ATK 26 91 152 196 235 274 314 337 DEF 61 212 355 458 549 641 734 789 Energy Recharge% 0% 0% 8% 16% 16% 24% 32% 32%
►Suggested Teammates
-
Still the most convenient buffer in the game even when his burst costs only 60 energy, Bennet will help Raiden's burst hit as hard as possible while Baal will keep his energy topped off
-
Sara is an excellent partner with her high cost energy burst, highly damaging elemental burst and different buffs she can provide through passives, artifacts, and constellations
-
Eula is a natural partner to Raiden, destroying enemies side by side with their strong elemental bursts, while Eula doesn't provide much to Raiden in terms of support besides a costly elemental burst, she's a strong character in her own right. Raiden on the other hand provides a lot of support for Eula, providing supperconduct, A buff to her burst's damage and a lot of energy recharge
-
Kazuha provides the best offensive support from the anemo element, providing Resistance shred and a good bonus to Electro damage, his 60 cost burst is pretty good.
-
The Traveler is one of the top partners to Baal. His energy Rechage% Bonus will boost Raiden's offensive abilities, while his energy generation and multiple buffs will improve her damage dramatically.
bonus points for having a 80 cost elemental burst. -
Sucrose is a pretty decent Anemo support, offering resistance shred, and grouping while having an 80 energy burst cost.
-
Xingqiu is one of the best supports in the game and with his trademark combo of offensive and defensive buffs he'll help baal destroy most enemies during her elemental burst duration, his high cost burst helps his case.
-
Mona's burst will provide a seizable damage increast to Raiden's own burst damage, she appreciates the quick pace proposoded by the shogun with their powerful AoE elementa bursts.
-
Beidou is an ok option to pair with raiden given her highly costly elemental burst and support options she provides like electro shred and a shield
►Summary
Pros:
- Good AoE damage.
- Generates energy for the party.
- Fast attack combo string, can drive many elemental bursts effortlessly.
Cons:
- Elemental skill messes with some reactions making her a liability in some teams.
- Limited supporting capabilities.
Building tips:
- Raiden has one artifact set that supports her most commonly used role as a DPS the
 Emblem of Severed Fate x4. For Elemental Mastery builds she can make use of the
  Thundering Fury x4 set.
 - Raiden is one of the few characters where Energy Recharge directly improves her damage output the other being Mona. Raiden as a DPS character wants the classic ATK and Crit substats, also Energy Recharge thanks to the way her kit functions.
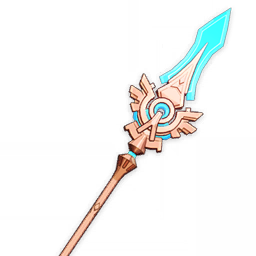
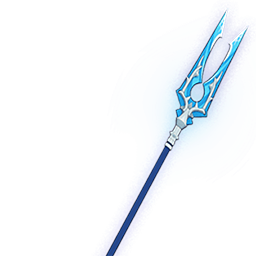
- Raiden makes good use of any Polearm that offers her the stats she desires ATK, Crit, or Energy Recharge. Her best option is her signature weapon Engulfing Lightning also she has an excellent free-to-play option in The Catch.
Gameplay tips:
- Raiden has a very specific gameplay loop, learning it is the first part of being a great Raiden player. First, you cast your elemental skill to boost all your team members' elemental bursts power. Then cycle through all your party members using their bursts and skills this will fill up your Chakra Desiderata. After this, you will use Raiden to unleash her full power elemental burst and to recover your party members' energy at the same time, to just restart the cycle all over.
- After bursting you want to basic attack for at least 5 seconds this will allow you to supply your team with the maximum amount of energy possible.
- Raiden attacks will have her dash to nearby enemies making her a great elemental burst driver, no enemy will escape even when they are knocked away by overload. In this very same vein, Raiden's burst will cause her to gain a huge amount of Poise which will allow her to accomplish her job without being stunned or displaced.
- Learning Raiden's combos besides button mashing will yield an important damage boost during her elemental burst. one of the easiest to execute combos that shields more damage than button mashing is: 3NA -> 1CH ->3NA -> 1CA -> 2NA -> 1CA -> 1NA ->1CA, there are many other possibilities some harder than others.
constellations power:
- Decent boost to Raiden's resolve stack gains, will finally let you reach the fabled 60 stacks regularly.
- Very big boost to Raiden's personal damage, DEF shreds are very rare and this one is sizeable.
- Early +3 lvls to our burst, very good on a character like her.
- 30% ATK for your whole party is decent but ATK is a cheap stat to come by.
- Skill lvls almost worthless.
- Removing 5 seconds to your burst CD can be broken with some characters but with others, it'll be unnoticeable. For example, Raiden already takes about 10 seconds of field time, and while you cast your other bursts most of your party abilities will come off cooldown naturally.
►Constellations.
► Talents

Passive Talent 1
Wishes Unnumbered

Passive Talent 2
Enlightened One

Passive Talent 3
All-Preserver

Basic attack
Normal Attack: Origin
| Ability | LVL1 | LVL2 | LVL3 | LVL4 | LVL5 | LVL6 | LVL7 | LVL8 | LVL9 | LVL10 | LVL11 |
|---|---|---|---|---|---|---|---|---|---|---|---|
| 1-Hit DMG | 39.65% | 42.87% | 46.1% | 50.71% | 53.94% | 57.63% | 62.7% | 67.77% | 72.84% | 78.37% | 84.71% |
| 2-Hit DMG | 39.73% | 42.97% | 46.2% | 50.82% | 54.05% | 57.75% | 62.83% | 67.91% | 73% | 78.54% | 84.89% |
| 3-Hit DMG | 49.88% | 53.94% | 58% | 63.8% | 67.86% | 72.5% | 78.88% | 85.26% | 91.64% | 98.6% | 106.58% |
| 4-Hit DMG | 28.98% + 28.98% | 31.34% + 31.34% | 33.7% + 33.7% | 37.07% + 37.07% | 39.43% + 39.43% | 42.13% + 42.13% | 45.83% + 45.83% | 49.54% + 49.54% | 53.25% + 53.25% | 57.29% + 57.29% | 61.92% + 61.92% |
| 5-Hit DMG | 65.45% | 70.77% | 76.1% | 83.71% | 89.04% | 95.13% | 103.5% | 111.87% | 120.24% | 129.37% | 139.83% |
| Charged Attack DMG | 99.59% | 107.69% | 115.8% | 127.38% | 135.49% | 144.75% | 157.49% | 170.23% | 182.96% | 196.86% | 212.78% |
| Charged Attack Stamina Cost | 25 | 25 | 25 | 25 | 25 | 25 | 25 | 25 | 25 | 25 | 25 |
| Plunge DMG | 63.93% | 69.14% | 74.34% | 81.77% | 86.98% | 92.93% | 101.1% | 109.28% | 117.46% | 126.38% | 135.3% |
| Low/High Plunge DMG | 127.84% / 159.68% | 138.24% / 172.67% | 148.65% / 185.67% | 163.51% / 204.24% | 173.92% / 217.23% | 185.81% / 232.09% | 202.16% / 252.51% | 218.51% / 272.93% | 234.86% / 293.36% | 252.7% / 315.64% | 270.54% / 337.92% |

Elemental skill
Transcendence: Baleful Omen
| Ability | LVL1 | LVL2 | LVL3 | LVL4 | LVL5 | LVL6 | LVL7 | LVL8 | LVL9 | LVL10 | LVL11 | LVL12 | LVL13 |
|---|---|---|---|---|---|---|---|---|---|---|---|---|---|
| Skill DMG | 117.2% | 125.99% | 134.78% | 146.5% | 155.29% | 164.08% | 175.8% | 187.52% | 199.24% | 210.96% | 222.68% | 234.4% | 249.05% |
| Coordinated ATK DMG | 42% | 45.15% | 48.3% | 52.5% | 55.65% | 58.8% | 63% | 67.2% | 71.4% | 75.6% | 79.8% | 84% | 89.25% |
| Duration | 25 s | 25 s | 25 s | 25 s | 25 s | 25 s | 25 s | 25 s | 25 s | 25 s | 25 s | 25 s | 25 s |
| Elemental Burst DMG Bonus | 0.22% Per Energy | 0.23% Per Energy | 0.24% Per Energy | 0.25% Per Energy | 0.26% Per Energy | 0.27% Per Energy | 0.28% Per Energy | 0.29% Per Energy | 0.3% Per Energy | 0.3% Per Energy | 0.3% Per Energy | 0.3% Per Energy | 0.3% Per Energy |
| CD | 10 s | 10 s | 10 s | 10 s | 10 s | 10 s | 10 s | 10 s | 10 s | 10 s | 10 s | 10 s | 10 s |

Elemental Burst
Secret Art: Musou Shinsetsu
| Ability | LVL1 | LVL2 | LVL3 | LVL4 | LVL5 | LVL6 | LVL7 | LVL8 | LVL9 | LVL10 | LVL11 | LVL12 | LVL13 |
|---|---|---|---|---|---|---|---|---|---|---|---|---|---|
| Musou no Hitotachi Base DMG | 400.8% | 430.86% | 460.92% | 501% | 531.06% | 561.12% | 601.2% | 641.28% | 681.36% | 721.44% | 761.52% | 801.6% | 851.7% |
| Resolve Bonus | 3.89% Initial/ 0.73% ATK DMG Per Stack | 4.18% Initial/ 0.78% ATK DMG Per Stack | 4.47% Initial/ 0.84% ATK DMG Per Stack | 4.86% Initial/ 0.91% ATK DMG Per Stack | 5.15% Initial/ 0.96% ATK DMG Per Stack | 5.44% Initial/ 1.02% ATK DMG Per Stack | 5.83% Initial/ 1.09% ATK DMG Per Stack | 6.22% Initial/ 1.16% ATK DMG Per Stack | 6.61% Initial/ 1.23% ATK DMG Per Stack | 7% Initial/ 1.31% ATK DMG Per Stack | 7.39% Initial/ 1.38% ATK DMG Per Stack | 7.78% Initial/ 1.45% ATK DMG Per Stack | 8.26% Initial/ 1.54% ATK DMG Per Stack |
| Resolve Stacks Gained | 0.15 Per Energy Consumed | 0.16 Per Energy Consumed | 0.16 Per Energy Consumed | 0.17 Per Energy Consumed | 0.17 Per Energy Consumed | 0.18 Per Energy Consumed | 0.18 Per Energy Consumed | 0.19 Per Energy Consumed | 0.19 Per Energy Consumed | 0.2 Per Energy Consumed | 0.2 Per Energy Consumed | 0.2 Per Energy Consumed | 0.2 Per Energy Consumed |
| 1-Hit DMG | 44.74% | 47.79% | 50.84% | 54.91% | 57.96% | 61.51% | 66.09% | 70.66% | 75.24% | 79.82% | 84.39% | 88.97% | 93.54% |
| 2-Hit DMG | 43.96% | 46.95% | 49.95% | 53.95% | 56.94% | 60.44% | 64.94% | 69.43% | 73.93% | 78.42% | 82.92% | 87.41% | 91.91% |
| 3-Hit DMG | 53.82% | 57.49% | 61.16% | 66.05% | 69.72% | 74% | 79.51% | 85.01% | 90.52% | 96.02% | 101.53% | 107.03% | 112.54% |
| 4-Hit DMG | 30.89% + 30.98% | 32.99% + 33.09% | 35.1% + 35.2% | 37.91% + 38.02% | 40.01% + 40.13% | 42.47% + 42.59% | 45.63% + 45.76% | 48.79% + 48.93% | 51.95% + 52.1% | 55.11% + 55.26% | 58.27% + 58.43% | 61.43% + 61.6% | 64.58% + 64.77% |
| 5-Hit DMG | 73.94% | 78.99% | 84.03% | 90.75% | 95.79% | 101.67% | 109.24% | 116.8% | 124.36% | 131.92% | 139.48% | 147.05% | 154.61% |
| Charged Attack DMG | 61.6% + 74.36% | 65.8% + 79.43% | 70% + 84.5% | 75.6% + 91.26% | 79.8% + 96.33% | 84.7% + 102.25% | 91% + 109.85% | 97.3% + 117.46% | 103.6% + 125.06% | 109.9% + 132.67% | 116.2% + 140.27% | 122.5% + 147.88% | 128.8% + 155.48% |
| Charged Attack Stamina Cost | 20 | 20 | 20 | 20 | 20 | 20 | 20 | 20 | 20 | 20 | 20 | 20 | 20 |
| Plunge DMG | 63.93% | 69.14% | 74.34% | 81.77% | 86.98% | 92.93% | 101.1% | 109.28% | 117.46% | 126.38% | 135.3% | 144.22% | 153.14% |
| Low/High Plunge DMG | 127.84% / 159.68% | 138.24% / 172.67% | 148.65% / 185.67% | 163.51% / 204.24% | 173.92% / 217.23% | 185.81% / 232.09% | 202.16% / 252.51% | 218.51% / 272.93% | 234.86% / 293.36% | 252.7% / 315.64% | 270.54% / 337.92% | 288.38% / 360.2% | 306.22% / 382.48% |
| Musou Isshin Energy Restoration | 1.6 | 1.7 | 1.8 | 1.9 | 2 | 2.1 | 2.2 | 2.3 | 2.4 | 2.5 | 2.5 | 2.5 | 2.5 |
| Musou Isshin Duration | 7 s | 7 s | 7 s | 7 s | 7 s | 7 s | 7 s | 7 s | 7 s | 7 s | 7 s | 7 s | 7 s |
| CD | 18 s | 18 s | 18 s | 18 s | 18 s | 18 s | 18 s | 18 s | 18 s | 18 s | 18 s | 18 s | 18 s |
| Energy Cost | 90 | 90 | 90 | 90 | 90 | 90 | 90 | 90 | 90 | 90 | 90 | 90 | 90 |
►Ascencion requirements
Levelup requirements
-

20000
-

1
- none
-

3
-

3
20
-

40000
-

3
-

2
-

10
-

15
40
-

60000
-

6
-

4
-

20
-

12
50
-

80000
-
3
-

8
-

30
-

18
60
-

100000
-

6
-

12
-

45
-

12
70
-

120000
-

6
-

20
-

60
-

24
80
Talent level up requirements
-

12500
-
3
-

6
1-2
-

17500
-

2
-

3
2-3
-

25000
-

4
-

4
3-4
-

30000
-

6
-

6
4-5
-

37500
-

9
-

9
5-6
-

120000
-

4
-

4
-

1
6-7
-

260000
-

6
-

6
-

1
7-8
-

450000
-

12
-

9
-

2
8-9
-

700000
-

16
-

12
-

2
-

1


