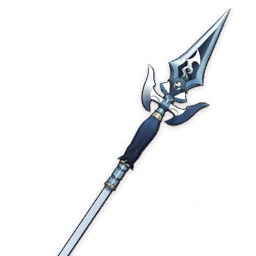
►Statistics
Rating:
Stats:
Attribute base 20* 40* 50* 60* 70* 80* 90 MAX HP 866 2872 4762 6091 7266 8440 9616 10331 ATK 17 56 93 119 142 165 188 202 DEF 63 209 346 443 528 613 699 751 ATK% 0% 0% 6% 12% 12% 18% 24% 24%
►Suggested Teammates
-
Xingqiu and Thoma join forces to create and impenetrable combo with excellent sustained AoE damage, In two character's you'll have incredible single target damage, serviceable AoE damage, shields, heals and lots of elements to create reactions with, both characters basically have a one second AoE elemental application, depending on the rest of your team you'll be veporizing or reverse-vaporizing or just plain old elemental mayhem.
-
Chongyun gives Thoma the possibility to be a sufficient melt bot, with added attack speed and Thoma's better self sufficiency when compared with Xiangling this classic Xiangling-Chongyun combo might just have been upgraded.
-
Bennett is an excellent supportive character with misleadingly strong personal damage, and excellent energy generation and a lot of tricks under his sleeve, Bennett and Thoma will form another excellent team backbone providing shields, healing and a lot of Pyro particles, This combo works best on mono Pyro or two Pyro two Geo comps where their strengths will be magnified.
-
Ganyu will permanently be on a quest to find a suitable Pyro partner to boost her own damage, Thoma is not exactly a match made in heaven but he is the closest character released yet suitable to be a Pyro supoort for her. Ganyu loves shields to a point that she feels very clunky to play without one while also Thoma's bigger range of action compared with Xiangling will allow him to apply Pyro more readily. The biggest downside of this combo is having to mix basic attacks in the gameplay to be able to trigger Thoma's elemental burst.
-
Hu-Tao as her Lyueyan brethren plays better with shielding supports, given her low HP restrictions she found it hard to include Bennett the premier Pyro support into her comps, now Thoma brings the coveted Pyro resonance along with a very serviceable shield, and good passive damage. It's not a coincidence that Thoma came out so close to the spookiest of all days.
-
Thoma and Klee what's there not to love about this duo, Thoma will keep Klee healthy, protected and laying the hurt, They'll activate their Pyro resonance together and will decimate and big or small enemies in the battlefield with their excellent AoE Pyro damage.
-
Kokomi works best in teams with 3 SubDPS characters or more, Thoma Provides constant Pyro AoE damage with basically no downtime and very little on field investment, combined with Kokomi they'll cover all the defensive bases of any composition while dealing consistent AoE damage.
-
Raiden Like Kokomi loves teams with consistent AoE Elemental reactions and strong SubDPS characters, Thoma when geared for damage will provide plenty Pyro damage in good AoE with little on field time investment on top of offering a hefty long form shield to ease the burden of his teammates. Raiden will allow Thoma to build very like Energy Recharge and more offensive stats to get even more damage as a trade off.
►Summary
Pros:
- Defensive Pyro sub DPS role compression.
- His Fiery Collapse has long reach.
Cons:
- Not big enough damage compared to Xiangling whose burst has no ICD.
- His shield needs to be charged up and might be broken too early.
- Requires Basic Attacks to proc his burst which might limit his compositions (cough Raiden).
Building tips:
- Thoma is a mixed shielding support / sub DPS character, depending on which aspect of him the player wants to focus it'll change his builds accordingly. Thoma can use the
 Noblesse Oblige x4 set for a good compromise between his burst's damage and his team's support. Thoma can also use
  Tenacity of the Millelith x2 and 2x of any other set that benefits him like
  Noblesse Oblige,
  Crimson Witch of Flames, or
  Emblem of Severed Fate. Other options include
  Crimson Witch of Flames x4,
  Emblem of Severed Fate x4, or any other combination between the sets already mentioned.
 - Thoma doesn't exactly have split scaling but his damage mostly depends on his offensive stats ATK, Crit, and Elemental Mastery, while his shielding depends on the HP stat. it's up to the player to choose according to the needs of his team.
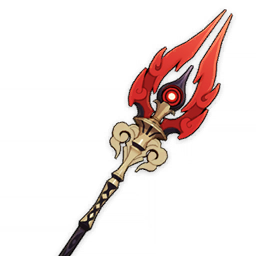
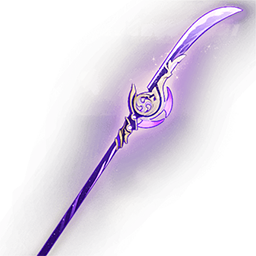
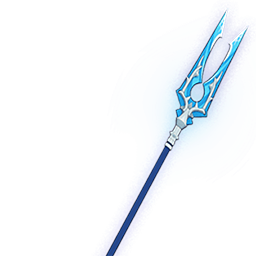
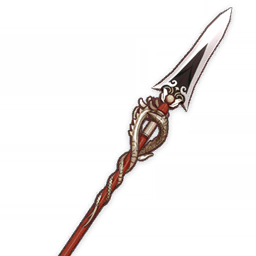
- In this manner, Thoma will make great use of any Polearm that offers him the stats he desires, ATK, Crit, and HP substats. Of special notice, The Staff of Homa will offer Thoma big amounts of HP, Crit DMG, and ATK which makes it his best weapon in slot.
Gameplay tips:
- Thoma's ability to improve his teammates' shield strength might make him a good choice in a double shield stacking comp with Zhongli or Noelle, in this case, he can provide a big amount of effective HP while stacking only offensive stats.
- While Xiangling has a lot more offensive potential than Thoma, Thoma's shield is on par with Zhongli's shield on initial cast and can become even stronger after a few Fiery Collapses.
Constellations power:
- QoL constellation which will bring more shielding power to the party and almost 100% burst uptime.
- This combined with C1 brings Thoma's burst uptime to 100%.
- A stronger shield, I'd prefer boosts to his offensive prowess his shield is good already.
- Some energy back, Thoma's burst is expensive but he has very high uptime of 20 seconds to gain energy for it, this is helpful but not necessary by any means.
- Levels for our burst will see some increase in DPS which is sorely needed.
- Good boost for the party but 15% Bonus DMG is not too strong.
►Constellations.
► Talents

Passive Talent 1
Snap and Swing

Passive Talent 2
Imbricated Armor

Passive Talent 3
Flaming Assault
Basic attack
Swiftshatter Spear
Charged Attack: Consumes a certain amount of Stamina to lunge forward, dealing damage to opponents along the way.
Plunging Attack: Plunges from mid-air to strike the ground below, damaging opponents along the path and dealing AoE DMG upon impact.
| Ability | LVL1 | LVL2 | LVL3 | LVL4 | LVL5 | LVL6 | LVL7 | LVL8 | LVL9 | LVL10 | LVL11 |
|---|---|---|---|---|---|---|---|---|---|---|---|
| 1-Hit DMG | 44.39% | 48.01% | 51.62% | 56.78% | 60.4% | 64.53% | 70.2% | 75.88% | 81.56% | 87.75% | 93.95% |
| 2-Hit DMG | 43.63% | 47.18% | 50.73% | 55.8% | 59.35% | 63.41% | 68.99% | 74.57% | 80.15% | 86.24% | 92.33% |
| 3-Hit DMG | 26.79% ×2 | 28.97% ×2 | 31.15% ×2 | 34.27% ×2 | 36.45% ×2 | 38.94% ×2 | 42.36% ×2 | 45.79% ×2 | 49.22% ×2 | 52.96% ×2 | 56.69% ×2 |
| 4-Hit DMG | 67.36% | 72.84% | 78.32% | 86.15% | 91.63% | 97.9% | 106.52% | 115.13% | 123.75% | 133.14% | 142.54% |
| Charged Attack DMG | 112.75% | 121.92% | 131.1% | 144.21% | 153.39% | 163.88% | 178.3% | 192.72% | 207.14% | 222.87% | 238.6% |
| Charged Attack Stamina Cost | 25 | 25 | 25 | 25 | 25 | 25 | 25 | 25 | 25 | 25 | 25 |
| Plunge DMG | 63.93% | 69.14% | 74.34% | 81.77% | 86.98% | 92.93% | 101.1% | 109.28% | 117.46% | 126.38% | 135.3% |
| Low/High Plunge DMG | 127.84% / 159.68% | 138.24% / 172.67% | 148.65% / 185.67% | 163.51% / 204.24% | 173.92% / 217.23% | 185.81% / 232.09% | 202.16% / 252.51% | 218.51% / 272.93% | 234.86% / 293.36% | 252.7% / 315.64% | 270.54% / 337.92% |

Elemental skill
Blazing Blessing
- Absorbs Pyro DMG 250% more effectively.
- When a new Blazing Barrier is obtained, the remaining DMG Absorption of an existing Blazing Barrier will stack and its duration will be refreshed. The maximum DMG Absorption of the Blazing Barrier will not exceed a certain percentage of Thoma's Max HP.
| Ability | LVL1 | LVL2 | LVL3 | LVL4 | LVL5 | LVL6 | LVL7 | LVL8 | LVL9 | LVL10 | LVL11 | LVL12 | LVL13 |
|---|---|---|---|---|---|---|---|---|---|---|---|---|---|
| Skill DMG | 146.4% | 157.38% | 168.36% | 183% | 193.98% | 204.96% | 219.6% | 234.24% | 248.88% | 263.52% | 278.16% | 292.8% | 311.1% |
| Shield DMG Absorption | 7.2% Max HP+ 693 | 7.74% Max HP+ 763 | 8.28% Max HP+ 838 | 9% Max HP+ 919 | 9.54% Max HP+ 1005 | 10.08% Max HP+ 1098 | 10.8% Max HP+ 1196 | 11.52% Max HP+ 1300 | 12.24% Max HP+ 1410 | 12.96% Max HP+ 1525 | 13.68% Max HP+ 1647 | 14.4% Max HP+ 1774 | 15.3% Max HP+ 1907 |
| Shield Duration | 8 s | 8 s | 8 s | 8 s | 8 s | 8 s | 8 s | 8 s | 8 s | 8 s | 8 s | 8 s | 8 s |
| Max Shield DMG Absorption | 19.6% Max HP+ 1887 | 21.07% Max HP+ 2076 | 22.54% Max HP+ 2281 | 24.5% Max HP+ 2501 | 25.97% Max HP+ 2737 | 27.44% Max HP+ 2989 | 29.4% Max HP+ 3256 | 31.36% Max HP+ 3539 | 33.32% Max HP+ 3838 | 35.28% Max HP+ 4153 | 37.24% Max HP+ 4483 | 39.2% Max HP+ 4829 | 41.65% Max HP+ 5191 |
| CD | 15 s | 15 s | 15 s | 15 s | 15 s | 15 s | 15 s | 15 s | 15 s | 15 s | 15 s | 15 s | 15 s |

Elemental Burst
Crimson Ooyoroi
Scorching Ooyoroi
While Scorching Ooyoroi is in effect, the active character's Normal Attacks will trigger Fiery Collapse, dealing AoE Pyro DMG and summoning a Blazing Barrier.
Fiery Collapse can be triggered once every 1s. Except for the amount of DMG they can absorb, the Blazing Barriers created in this way are identical to those created by Thoma's Elemental Skill.
Blazing Blessing:
- Absorbs Pyro DMG 250% more effectively.
- When a new Blazing Barrier is obtained, the remaining DMG Absorption of an existing Blazing Barrier will stack and its duration will be refreshed.
The maximum DMG Absorption of the Blazing Barrier will not exceed a certain percentage of Thoma's Max HP. If Thoma falls, the effects of Scorching Ooyoroi will be cleared.
| Ability | LVL1 | LVL2 | LVL3 | LVL4 | LVL5 | LVL6 | LVL7 | LVL8 | LVL9 | LVL10 | LVL11 | LVL12 | LVL13 |
|---|---|---|---|---|---|---|---|---|---|---|---|---|---|
| Skill DMG | 88% | 94.6% | 101.2% | 110% | 116.6% | 123.2% | 132% | 140.8% | 149.6% | 158.4% | 167.2% | 176% | 187% |
| Fiery Collapse DMG | 58% | 62.35% | 66.7% | 72.5% | 76.85% | 81.2% | 87% | 92.8% | 98.6% | 104.4% | 110.2% | 116% | 123.25% |
| Shield DMG Absorption | 1.14% Max HP+ 110 | 1.23% Max HP+ 121 | 1.32% Max HP+ 133 | 1.43% Max HP+ 146 | 1.52% Max HP+ 160 | 1.6% Max HP+ 174 | 1.72% Max HP+ 190 | 1.83% Max HP+ 206 | 1.94% Max HP+ 224 | 2.06% Max HP+ 242 | 2.17% Max HP+ 261 | 2.29% Max HP+ 282 | 2.43% Max HP+ 303 |
| Shield Duration | 8 s | 8 s | 8 s | 8 s | 8 s | 8 s | 8 s | 8 s | 8 s | 8 s | 8 s | 8 s | 8 s |
| Scorching Ooyoroi Duration | 15 s | 15 s | 15 s | 15 s | 15 s | 15 s | 15 s | 15 s | 15 s | 15 s | 15 s | 15 s | 15 s |
| CD | 20 s | 20 s | 20 s | 20 s | 20 s | 20 s | 20 s | 20 s | 20 s | 20 s | 20 s | 20 s | 20 s |
| Energy Cost | 80 | 80 | 80 | 80 | 80 | 80 | 80 | 80 | 80 | 80 | 80 | 80 | 80 |
►Ascencion requirements
Levelup requirements
-

20000
-
1
- none
-

3
-

3
20
-

40000
-
3
-

2
-

10
-

15
40
-

60000
-

6
-

4
-

20
-

12
50
-

80000
-
3
-

8
-

30
-

18
60
-

100000
-

6
-

12
-

45
-

12
70
-

120000
-
6
-

20
-

60
-

24
80
Talent level up requirements
-

12500
-

3
-

6
1-2
-

17500
-

2
-

3
2-3
-

25000
-

4
-

4
3-4
-

12500
-

3
-

6
4-5
-

37500
-

9
-

9
5-6
-

120000
-

4
-

4
-

1
6-7
-

260000
-

6
-

6
-

1
7-8
-

450000
-

12
-

9
-

2
8-9
-

700000
-

16
-

12
-

2
-

1


